Warning: this is a long post!
If you use Adobe FMLE or similar software to create f4v video files you may have wondered if there is a way of extracting audio From Flash Media Live Encoder videos (f4v files) to create an MP3 file that can be played on mobile devices such as iPhones. While there are commercial packages that can extract the audio from f4v files I describe below a simple way to do it for free.
I am sure there are more elegant ways to do this but this is a very quick way to create an MP3 file from an .F4V movie. Do not that there is going to be some loss of quality given that creating an MP3 file involves compression – personally I have not noticed any difference but this might be because I am starting with a 128kbps file anyway.
Note: The instructions below are for Windows 7.
Step 1: Obtain media player
Download and install the free open source cross-platform multimedia player VLC Media Player from VideoLAN at: http://www.videolan.org/vlc/index.html
This player will play many different types of media files, both audio and video, as well as providing the capability to convert between formats.
Step 2: Open VLC Media Player
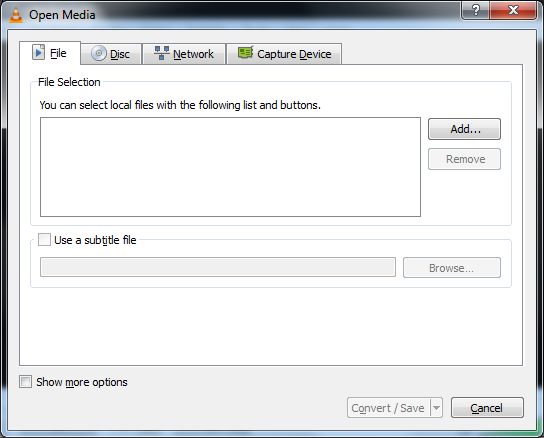
Step 3: Click on Media and then Convert/Stream
Step 4: Click on Add and select the .f4v media file that you wish to extract the audio from
Step 5: Click on the Convert / Save button:
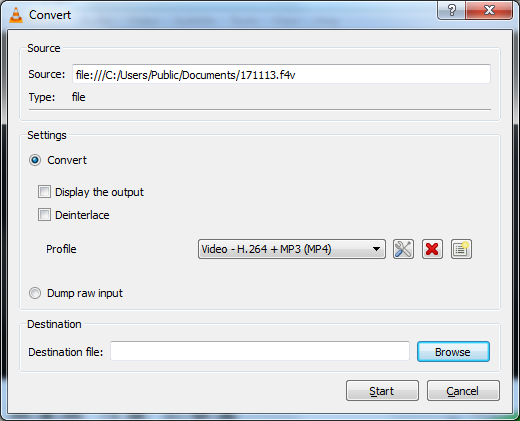
Step 6: Change the Profile to Audio – MP3 in the drop-down menu
Step 7: Click on the Tool button (to the left of the red X button)
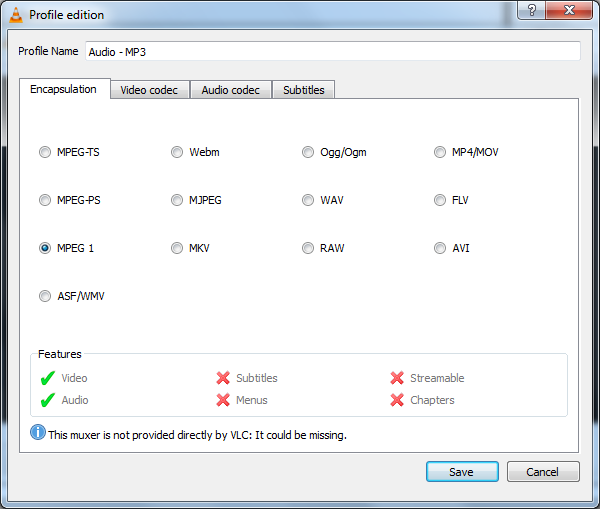
Step 8: Change the Encapsulation to RAW
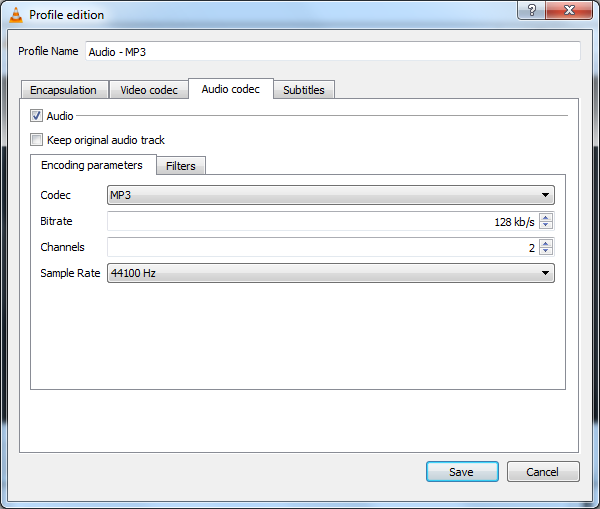
Step 9: Click on the Audio codec tab
Step 10: Configure the MP3 Codec Settings
Set the Codec to MP3 and then choose appropriate settings for the Bitrate and Sample Rate. These will be dependent on the quality of the original audio but will also impact the size of the MP3 file that gets produced.
Click on Save to exit this tab.
Step 11: Choose a location & filename for the MP3 output
Enter a path and name for the destination MP3 file. There is no need to enter a suffix as the software will default this to .raw.
Step 12: Start the audio extraction process
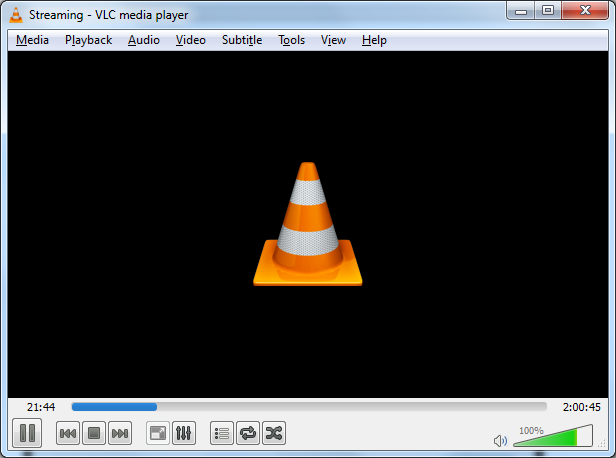
Click Start and the conversion process will begin. While this is running you will see a blue progress bar indicating how much of the file has been processed:
Once the file has been processed you can close the media player.
Step 13; Finalise the process by renaming the output file
Now locate the audio file that has been created and rename the extension from .raw to .mp3 This MP3 file can now be used as you wish.
Conclusion
So there you have it – a simple way to extract audio From An f4v file and create an MP3 audio file. I am certain there are more elegant ways to do it but this works for me and results in an MP3 file that can be used on any device that supports that audio format.
Do get in touch and let me know how you get on with this method and if you can suggest any improvements.


